Wallerawang - Construction, February 2012
After our customary holiday break, the Group was back in action after mid-January, setting up the layout in order to achieve work which spanned module joins (as well as giving us a chance to run some trains). The first job to tackle was fixing a vertical difference in rail height between the two storage yard modules. This was resolved by loosening the screws which hold the rails in place and adding packing material until the rails were once again in alignment. Secondly, static grass was applied along the front of the layout, between the Down rail lines and the layout edge. Our usual supply of three lengths and shades of grass were blended in differing ratios, resulting in subtle colour changes across the area.
Static grass along the hillside between the railway line and the pine forest.
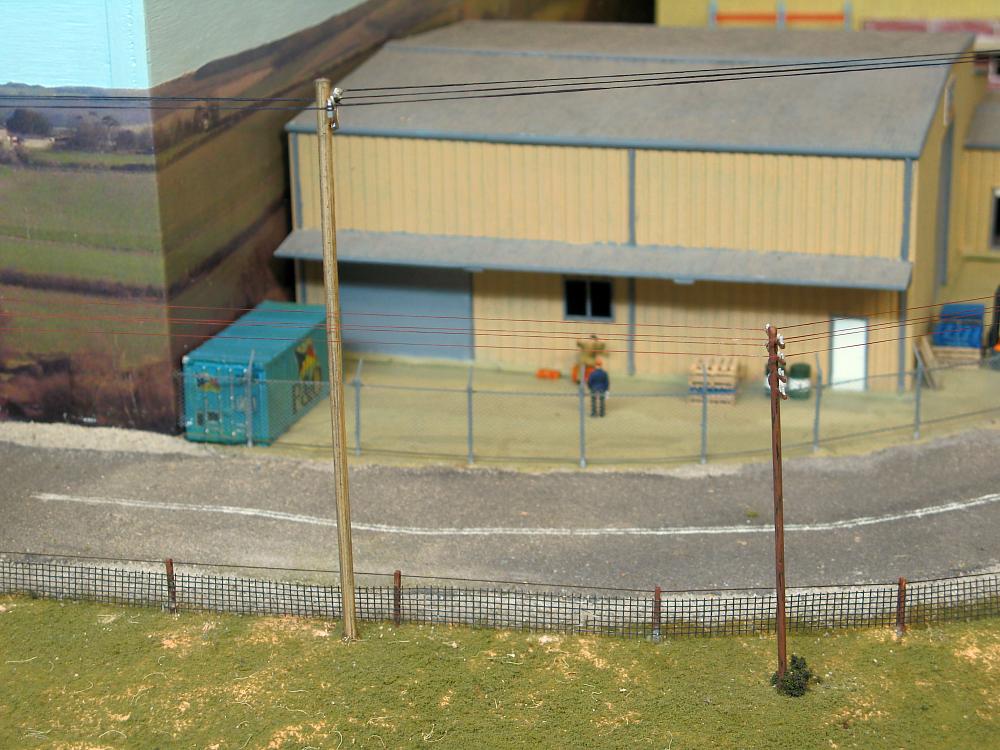
The third item was to finish overhead street power poles and lines. So far only the two front modules had power and telegraph poles, so the rest of these were installed along the full length of all scenicked modules. For the power lines, timber dowel was stained to represent weathered grey timber poles. Cross-arms were cut from Atlas power poles and painted to represent simple single-arm poles as used in country areas. The charcoal coloured power lines are stretchy Oingo-Boingo wire strung and glued to the porcelain insulators on each cross-arm. Wires have been stretched across module joins, and have been made removeable to allow for separating and packing away individual modules at the end of each show. The shorter telegraph poles are Dapol power poles painted to represent railway telephone poles. Fine rust coloured Oingo-Boingo wire was used for the multiple telegraph lines.
Newly strung power and telegraph lines running past the VES workshop yard.
The last task on the list was filling some of the slight scenic gaps between module ends. Felt was glued to the side faces of the modules just below scenery level, and once the glue dried additional scenic material was applied on top to blend over the gaps.
Once these jobs were completed it was time to pack up the layout and move onto adding more detail to individual modules.
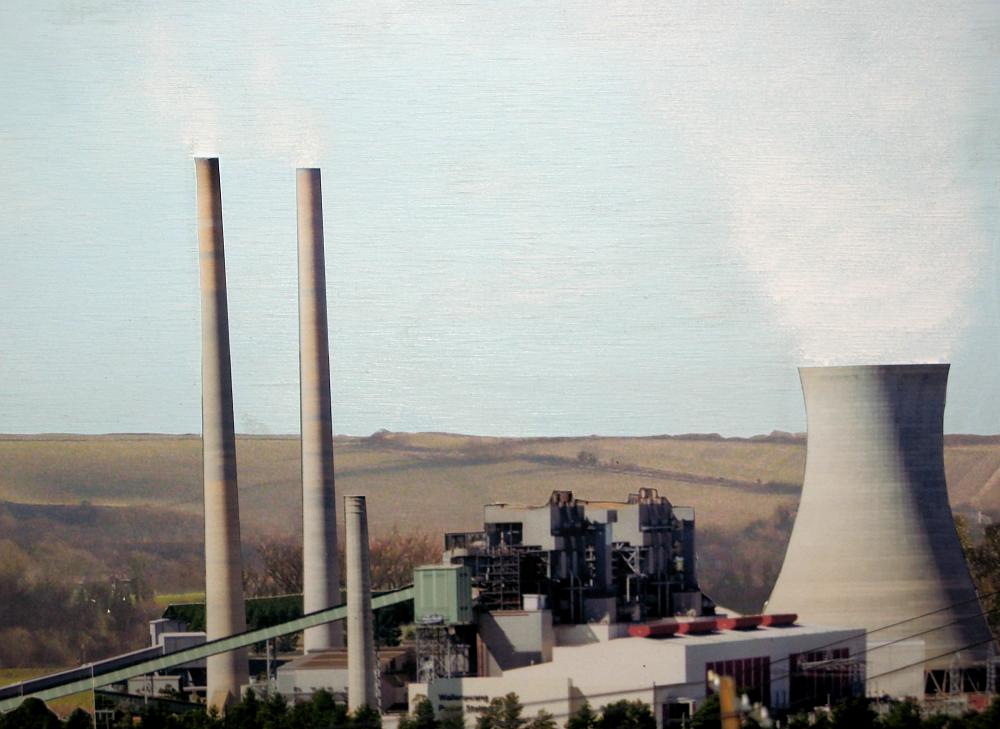
To break up the sky in the backdrop we tried our hand at applying clouds onto the sky blue paint. A mid grey colour was airbrushed in a rough pattern where the base of the cloud was to be. This was then oversprayed with white above the grey and slightly covering it. A swirling pattern seemed to give the best result, and not to totally cover the grey but to sit slightly above it. Letting the grey show through the white in places gave the clouds more depth and more of a three-dimensional look. At the same time we airbrushed white paint above the power station to represent steam from the stacks. The paint was airbrushed on thick above the top of the stacks, and was gradually brushed on thinner as it moved further away from the stacks, to show the steam dissipating into the atmosphere.
Wallerawang power station pictured on the backdrop. The image is a colour print of the real power station glued to the backdrop, with white paint airbrushed above the stacks to represent billowing steam.
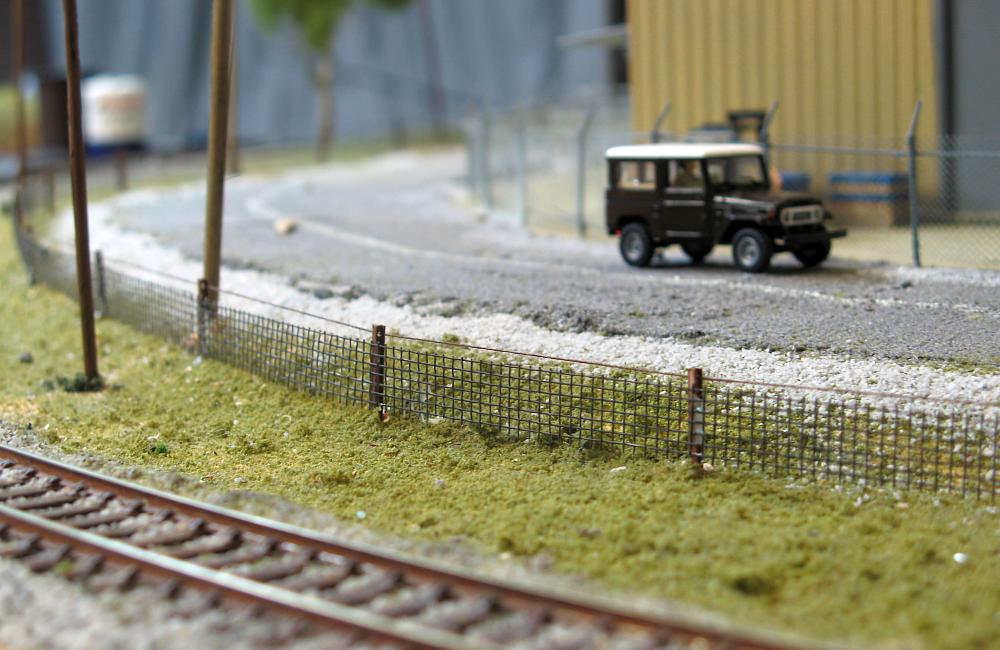
On the Sydney side of Wallerawang station, a railway boundary fence was constructed between the rail lines and the road. This fence was based on standard railway drawings for a rabbit-proof boundary fence. Posts are Evergreen styrene H-beam painted 'rust' to represent old rail. These were cut to length, had a small hole drilled near the top of each post, then glued into pre-drilled holes in the layout. Brown cotton thread was, well, threaded through each of the small holes at the top of each post. This represents the top row of barbed wire. Fibreglass flyscreen was cut into strips and glued along the front face of each of the posts to represent the wire mesh portion at the base of these rabbit-proof fences. All that remains to do is add vertical spacers or stretchers, which will be florists wire painted a dark rust or black colour and cut to length.
A rabbit-proof fence running alongside the road opposite the factories. The fence will be completed with the addition of two wire stretchers glued onto the mesh between the posts.
The two factories at the Sydney end of the layout have been in place for a while, but have been crying out for extra detailing. Photographs were taken of typical factories as inspiration and these generated lots of ideas for how to dress up our own facilities. Various bits and pieces were purchased or built to liven up these areas. Containers and trucks including skeleton trailers were positioned in the yards. Wiking forklifts were purchased and installed. Scale figures were bought and modified or painted to represent appropriate factory personnel and glued into place. Drums from Uneek and pallets scratchbuilt from scale stripwood have been painted and added around the factory yards.
View of the factory yards with some of the detailing in place.


